Planning Ahead for the Holidays (Making a Winter Pinwheel) August 9, 2012
You may say that I am “jumping the gun”. But the thing that makes the holidays so stressful, is that it all comes at once! Plus, having a retail shop during the holidays is going to bump everything up a notch!

While at the gift show, I saw all sorts of paper crafts that I could make myself. The wholesale prices were very high but the creativity was wonderful!
You may have noticed that I’m making more changes to my blog. Besides the new “Become a Blog Sister” tab and the “Our Home” tour, I’ve added “The Workshop” page, where I talk about my new adventure. At the Workshop, I’ll not only sell repurposed, painted furniture, but I’ll have classes to teach others how to paint their own furniture. I’ll sell pinwheels and paper cone wreaths and teach a class, showing you how to do it yourself. I won’t actually do it all by myself. It will be a collaborative effort, for sure! Right now, I’m reaching out to a few people who can help make it a fun, friendly, creative place!
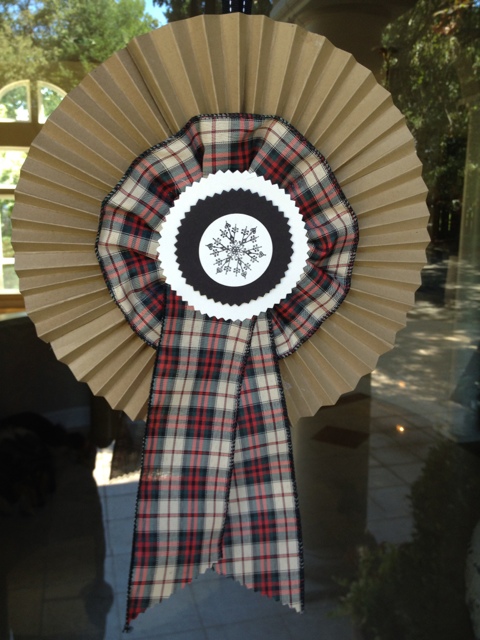
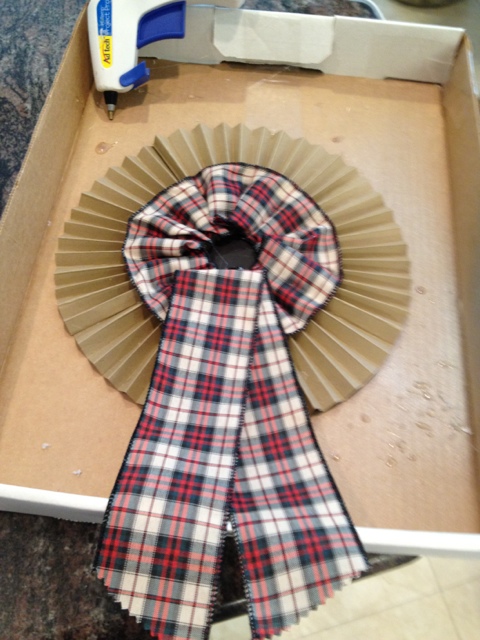
So, back to making the pinwheel! You’ll need the ever popular glue gun, 3 different colors of coordinated card stock, a piece of cardboard and some ribbon. The most time-consuming part is folding the card stock paper. I used two pieces of card stock paper cut in half, lengthwise.

Each fold should be about a third of an inch deep. (I did this, while watching the Olympics last night.) Then,glue all of the pieces together.

In a couple of minutes, when the glue has dried, flatten out the pinwheel. Then, take a smaller piece of cardboard and glue it to the back of the pinwheel, to give it support.

Taking a wide plaid ribbon, I glued it about every four folds, into the pinwheel. (I purchased my wide plaid ribbon at Costco yesterday, for $7.99 for 50 yards.)

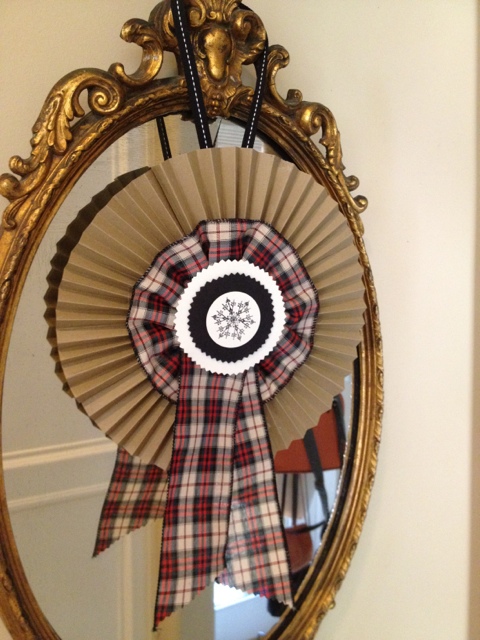
I then added the hanging ribbon pieces…

Now, tape the center circles together with 3-D tape and then glue to the pinwheel.

(I need one of those punching gizmos, so I can make truly round circles!)

Voila! Ain’t that cute? If I had some beautiful German glass glitter, I would have made a different centerpiece, but alas, I have no glitter! It’s on my list! There are so many variations possible, so have some fun!


Wow that turned out so great. You can use my little friend the Cricut to make all the perfect circles you want! I am planning for Christmas already too and started on my mantlescape for this year. Maybe it won’t feel like 107 degrees if I’m working on Christmas stuff this weekend!!
I love it the way it is Barbara! It looks good for autumn actually!
xoxo
Karena
Art by Karena
2012 Artists Series
Cute, cute wreath Barb!….Love Costco ribbons!…So happy for you as you embark on your new venture….you will make a wonderful instructor!!…